Tuesday, April 24, 2012

Make a $3 Topiary

So I wanted a some what tall topiary for the corner of my dinning room, but you know me im cheap and didnt want to pay the stupid prices for them, like $30-50 !! So this is what i came up with for $3


you will need, newspaper, duck tape, dowel rod, brown, green & black paint, hot glue, rocks or something for weight in the pot, flower pot, box, and green spanish moss.

ok we all know how stupidly expensive the styrofoam balls are, like $10 for a big one! no way so this is how i made the balls.

crumple up sheets of newspaper, ball them all together, then wrap in duck tape keeping the ball shape, You can then roll it around with your palm to shape it more.

 Ta dah! it will be slightly lumpy but no big deal, the moss covers it up.


I made 3, You want the bottom biggest ball to be slightly smaller than the flower pot.
Then I spray painted them green, and painted the cardboard box black.
I also painted the dowel rod brown. After all was dry I drilled a hole through the center of the 2 bottom balls to fit the rod through. I drilled the top ball halfway through. Then positioned them on the rod a few inches apart. I glued the rod in the pot and held it while i filled it with sand a sea shells.

Then seperated the moss, and put some hot glue on the ball, then started sticking. Holding it a few seconds to dry, then repeat.
 I put a piece of newpaper over the pot to keep all the little pieces of moss that falls off from getting in with the shells. And after some time and a ton of hot glue and burns later set it on the box and...


It looks awesome in the corner of my dinning room :)

p.s. go to dollar tree :)


Thursday, April 19, 2012

Kitchen, dinning room sign

I LOVE this! I used a piece of wood from a pallet, Free Paint from Ace Hardware, sand paper, printed off letters, a pencil, and a small paint brush.

Its so easy, after printing off the words, turn the paper over and color hard over the letters with a pencil, this creates CHEAP carbon paper, I went to buy some at staples and it was like $16 no thanks!  Put the letters on the board and trace with a pen.

It shows up really good, dont even bother wasting money on carbon paper!
Next take the small paint brush, or a paint pen and fill in!
This coast me nothing but a few hours! :-)


I hung it in my dinning room above the doorway to the hallway!


Be inspired :-)

Tuesday, April 17, 2012

Craigslist Chandelier Make over

I know its been a while but ive been BUSY making over my house :-) lots of posts soon to come.
I wanted to share with you my awesome new dinning room light make over!


Ta Dah! I always like showing the finished product first!


This is what I had! OMG I hated it SOOOO MUCH! ugly!


I got this on Craigslist for $10 :-) i spent $2 on spray paint! I liked the nickle it was before, but it needed to be black to go with the rest of the dinning room!


Love it! its so much better than that ugly globe I had before! and switching out the light wasnt hard at all, which my husband did for me!

p.s. I painted the walls :-)


Friday, March 16, 2012

Trash Electrical lantern to Candle holder


So I was taking a walk and found this awesome, im assuming broken, lantern at the curb on trash day! along with these super cool dresser drawers! I walked past it once but on the way back around I couldnt pass it up again!


So I removed the electrical part that holds the light bulb


Then I removed the glass


Its so DIRTY!!
so i gave it a good scrubbing!!


I washed it, gave it a few coats of black spray paint, and a candle.


so glad I saved it from the landfill!


:-)

Tuesday, March 13, 2012

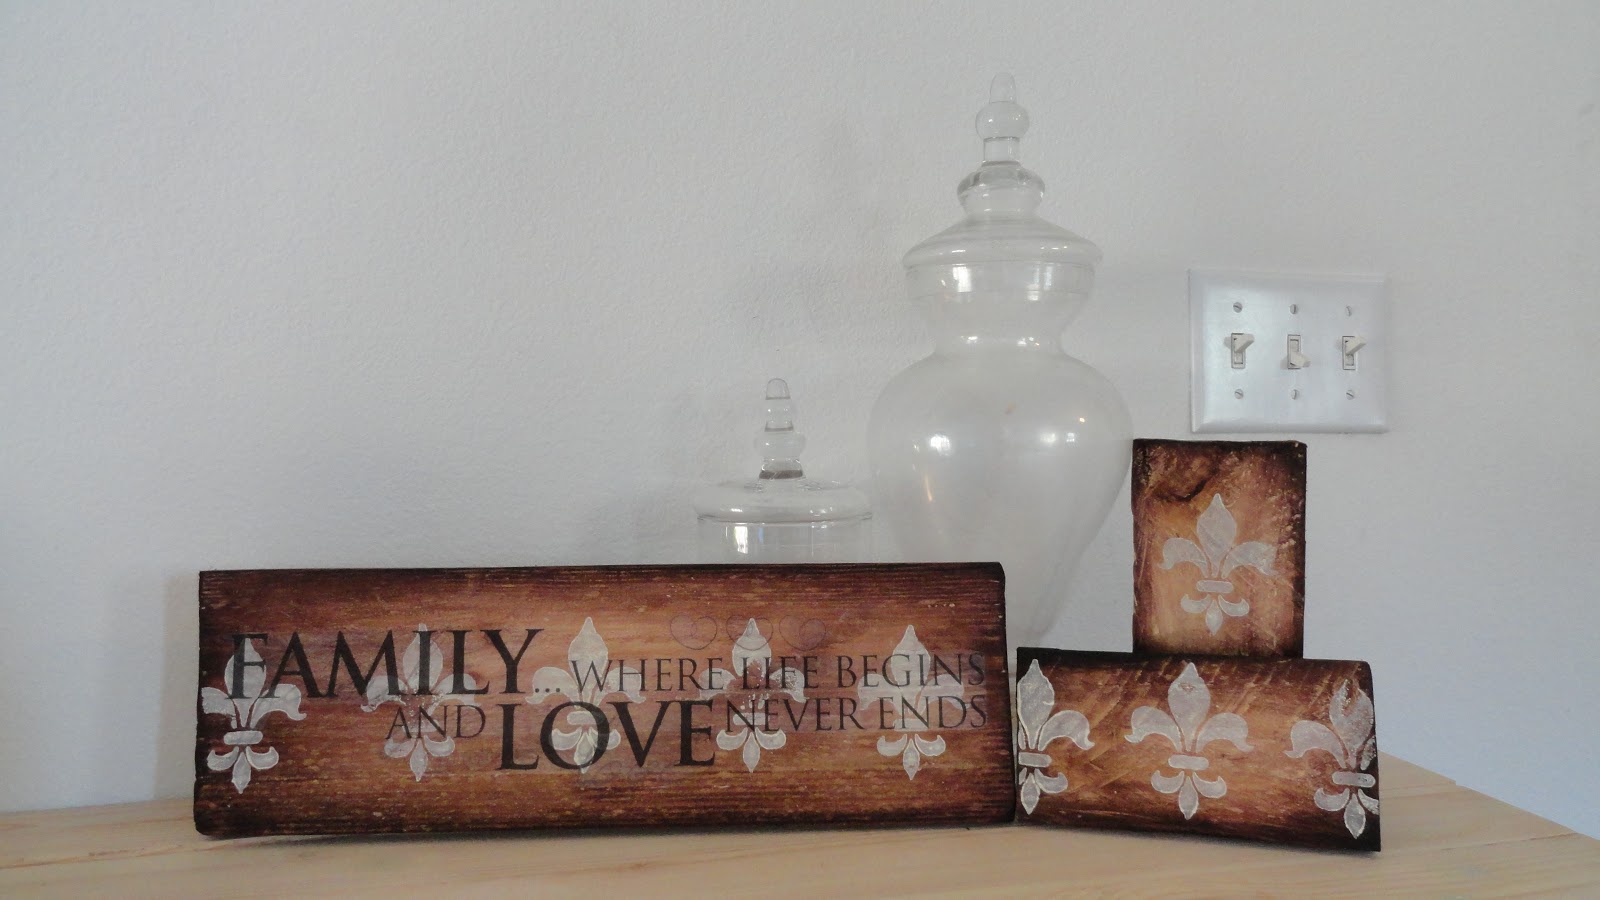
Pallet Art

Pallets are easy to aquire, and most of the time free. I love reusing pallets!! FREE lumber!! I use them for tons of projects, I even built a sofa table out of them! Heres a fast dollar store project!
  I used the 1x6 and a 1x3 scrap to make the two blocks.
the hardest part is taking apart the pallet without breaking the boards, but this time I just cut it off
between the supports cause thats all I needed anyways. I sanded down just enough to get rid of the splinters, I wanted the old beaten up look.
I got this decal at dollar tree, they have a bunch to choose from in the craft section.


I used and old rag and some stain and rubbed it on the wood keeping it darker around the edges and lighter in the middle. I also burned the edges to make it really stand out. I let that dry.

I used my fleur de lis stamp and rolled on some beige paint, the board isnt totally flat, so it didnt go on even, which is fine, I wanted that look. Then I centered and pressed the decal on, ta dah! easy
This coast me only $1!!!!! but if you dont have the supplies on hand the stain is about $4 or you could paint, or leave natural, or just burn it, and the stamp with coupon is $4 at Michaels, and the decal is $1. still only $9 give or take a few.
I LOVE IT!! this took about an hour to make! happy pallet crafting!

Thursday, March 8, 2012

St. Patricks Day wreath

Heres a cheap holiday project made from cereal boxes, glue, scrapbook paper and a dollar store wreath.

start with a wreath that looks like this


I spray painted it, because really its the easiest way to paint.
Then I went online and found a shamrock shape I liked and printed it off in 3 sizes, I ended up only using to bigger two.
Then I gathered up my green scrapbook paper
and boxes

open the bottom, and cut up one corner to flatten them out.
then I just traced and traced and traced, then cut out and out and out.

same thing with the scrapbook paper.
Then I used mod podge to glue the paper to the cardboard. Then I hot glued the cardboard to the wreath. To make the smaller ones stand up, I cut a strip of cardstock 3/4 in wide and folded into a box (like a box kite with 2 open ends) and hot glued the open box part to the back of the sharock, and the other open end to the top of the other shamrock. doing it this way makes it more stable and it wont fold flat.
Attach a ribbon, or just hang from the hanger, and there you go.


Wednesday, March 7, 2012

Date Art


Do you have picture frames laying around like this?


they have great lines and a good matt? they just need a little tlc.

remove the staples.
after i got it all appart, i spray painted the frame black.

this frame is an odd size, so this matt was a keeper, it just needed some paint.
first i took the inner matt off by using a knife and carefully sliding it between the matt and the board.
(excuse the dishses lol)
ok so its off
i just used regular laytex paint and a roller.
ta da!! dont waste your money buying new matts!

while the frame and the matt where drying I went on Word and created my date art.
since the opening of the matt was 7in by 11.5 i made sure to keep the text inbetween those in the ruler. I printed it off on scrapbook paper since its 12x12 i just cut it down to the standard 8.5 width and left the whole 12in length. centered it in the matt and hung it up!


the top dates are our birthdays the red is our wedding day, and the bottom is our first date, and engagement date.